Final Experiment: Live Diorama
After building my depth estimation tool, I played around with images to see which ones felt more interesting to me.
Quickly it became evident that I was most drawn to 3D models of spaces. These felt very lifelike; small dioramas of scenes I captured. It feels most magical to see the flat photos of spaces be stretched in the 3 dimensions, looking almost like what they looked like when I capture them.

Thinking about spaces, I was reminded of the gif Audrey Oh and I made on our first semester:
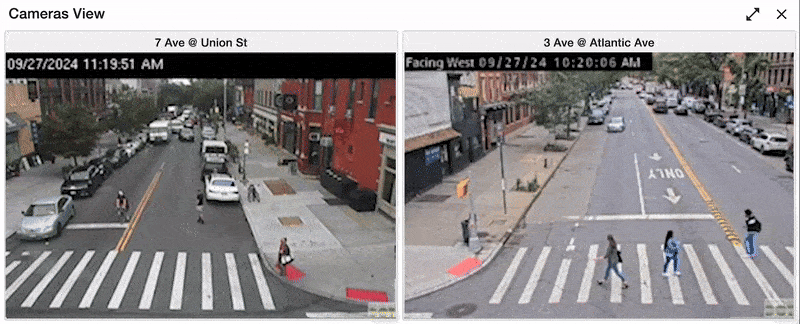
To record it, we used the feed of nyc dot traffic cameras available online. These cameras take pictures every few seconds, saved as low resolution images. These conditions are perfect for the browser based depth estimation models, since it gives them time to do the estimation and don't have that many pixels.
Therefore, I wondered what a live-updating diorama of Manhattan would look like and how to navigate it. So, I decided to do a test build of a Brooklyn intersection I know very well and happens to have three traffic cameras.
I began by porting my Photo(grammetry) Booth sketch to do server side depth estimation and building the .obj, so that the front-end sketch only had to render and update the 3d model and texture.
Unfortunately, with transformers.js this could now only use cpu to run the model, but it still worked pretty fast at this scale. I built the frontend on p5.js and began experimenting how to place the three views of the Sand St. and Jay St. intersection.
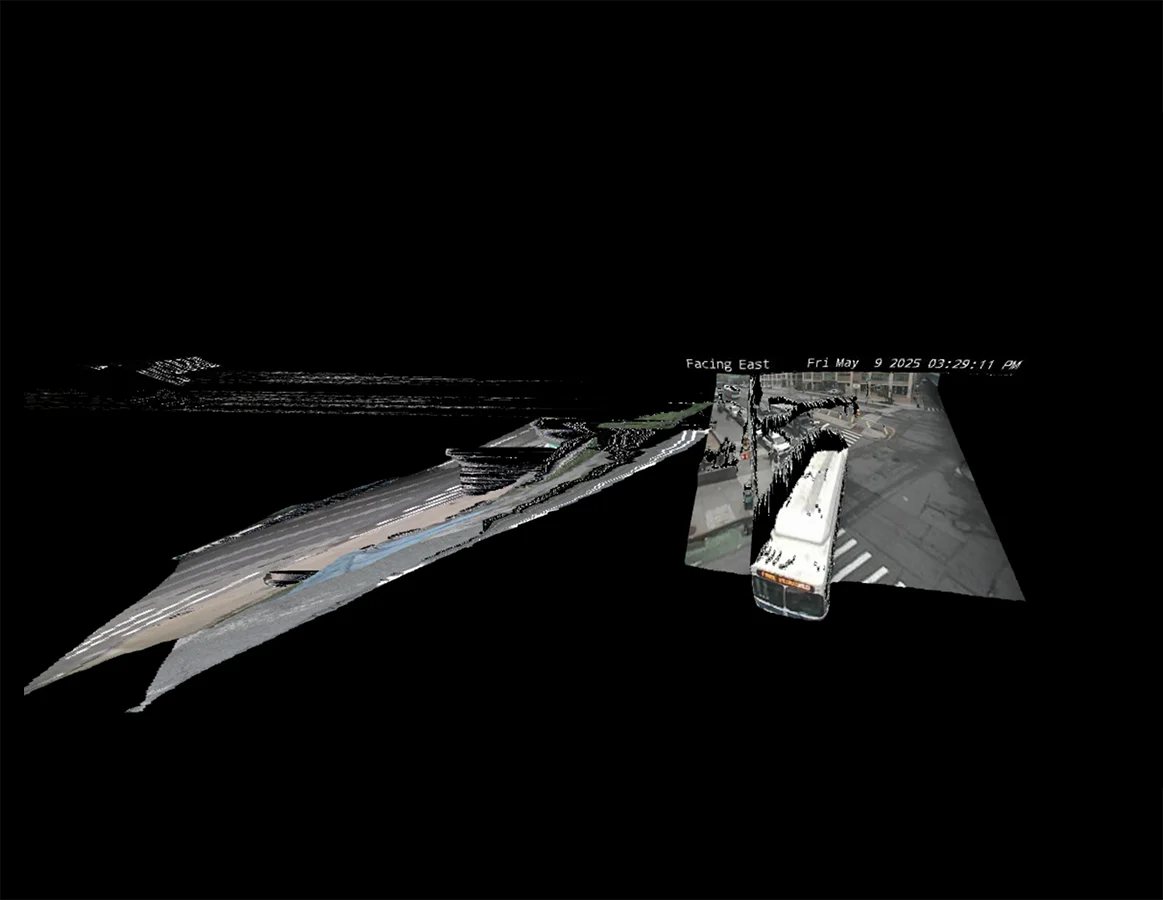
After a couple of hours trying this out, it was clear that p5 was not a very good place to try to place 3D models, using only translate(), rotate() and scale(). So I decided to migrate to A-FRAME.
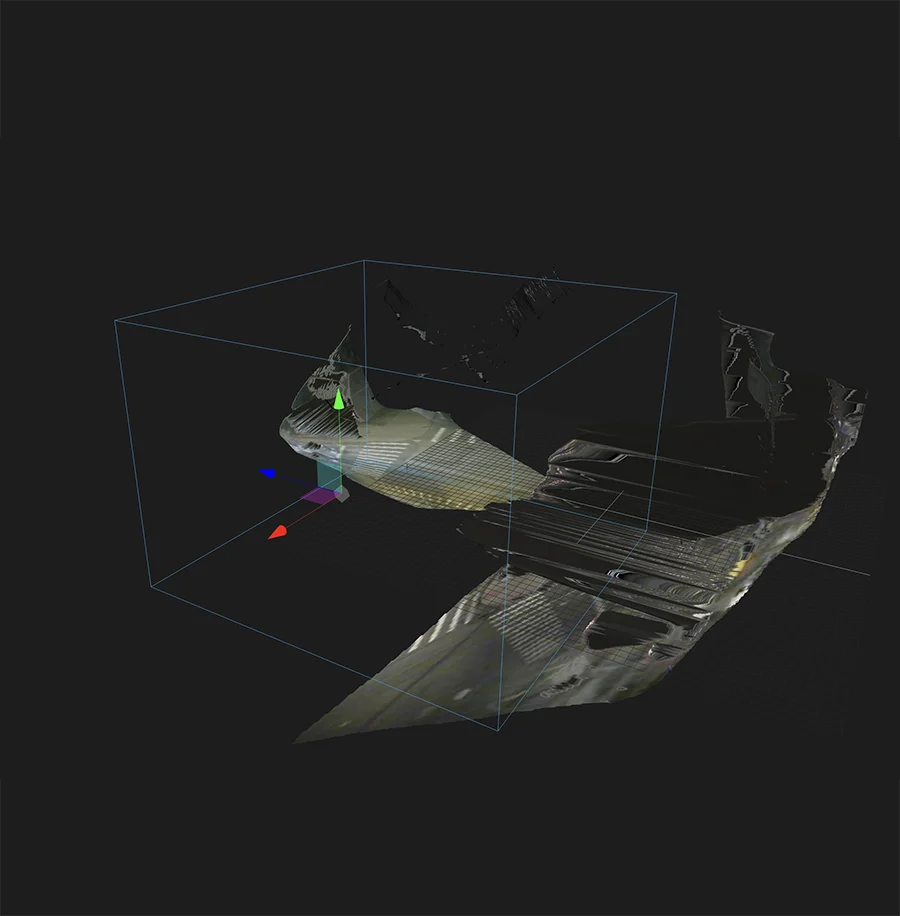
A-FRAME's visual inspector allowed me to have more control over placing the models, although it was still not an easy feat. Because the cameras don't contain any attached data (latitude/longitude, direction of view, absolute height) it means I have to estimate it by ear for each camera. I made an attempt at this with the intersection:
It's not perfect, but it's a good start that showed me there maybe was a chance this could work.
The next steps in this project are:
- Tweak the 3D model update system on the frontend, to avoid a flash of unloaded content.
- Make the model's texture transparent in areas where the change in depth is too large for the voxels to actually be connected.
- Remove voxels that have a z = 0 depth, as these become a sort of background that could cover actual depth information from other views
- Place a flat map on the "floor" as an alignment guide.
Ultimately, I am still intrigued by this idea. Although it is evidently becoming a sort of digital-craft project, I think it could reach a novel view of our map. However, I can not tell for sure until more views get mapped out.
Week 08 Depth Estimation Playground
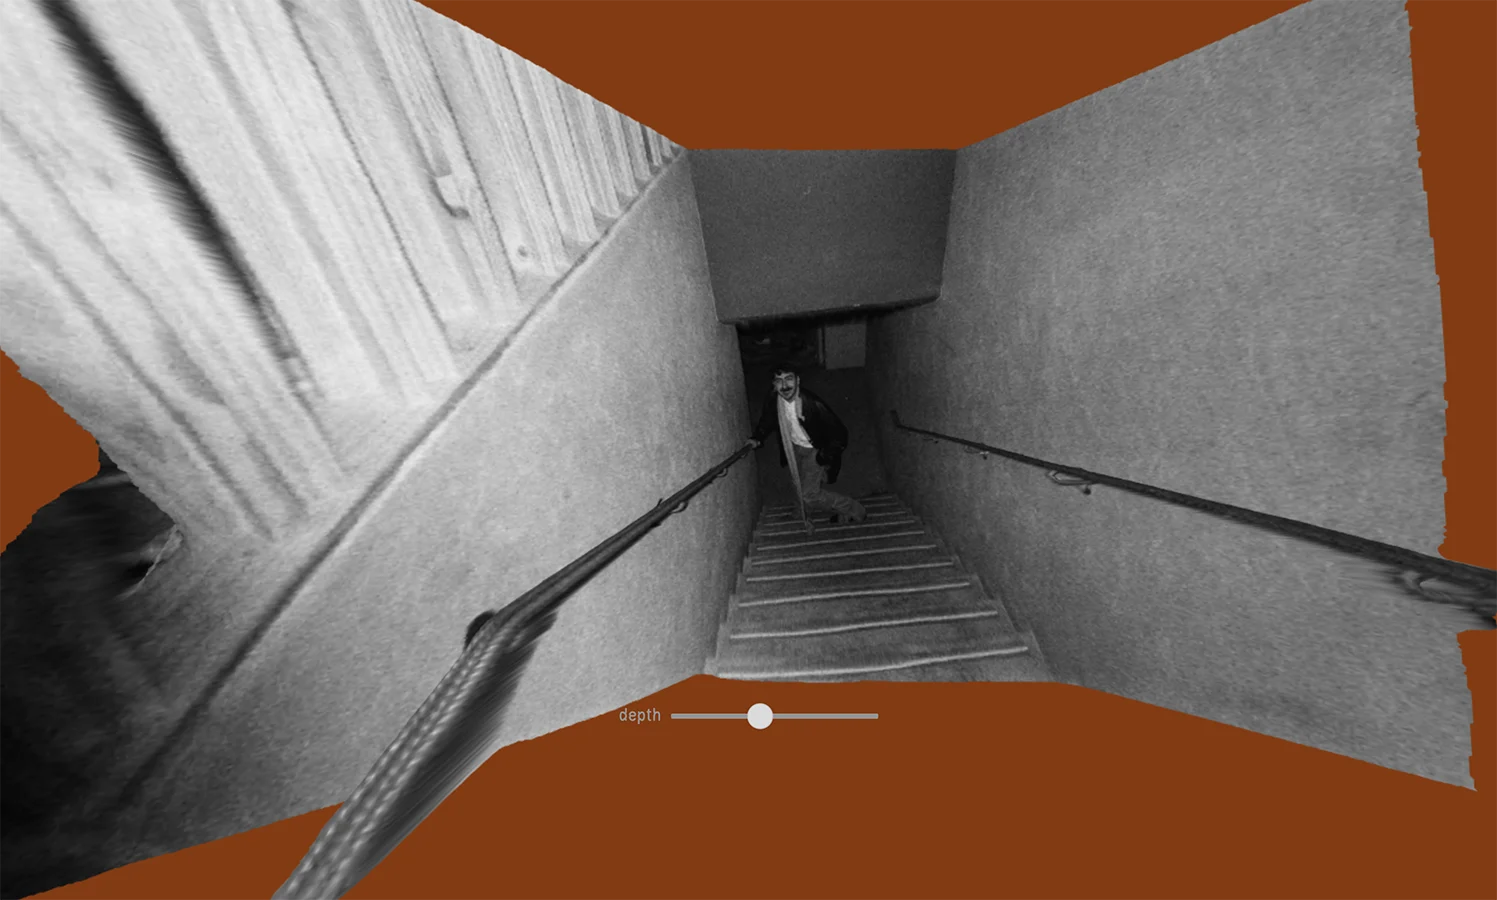
Ever since a couple of weeks ago, when doing my first experiments with depth estimation, I've been somewhat enthralled by its graphic qualities. It feels particularly magical to be able to somewhat derive depth from a flat image, like enhancing a memory.
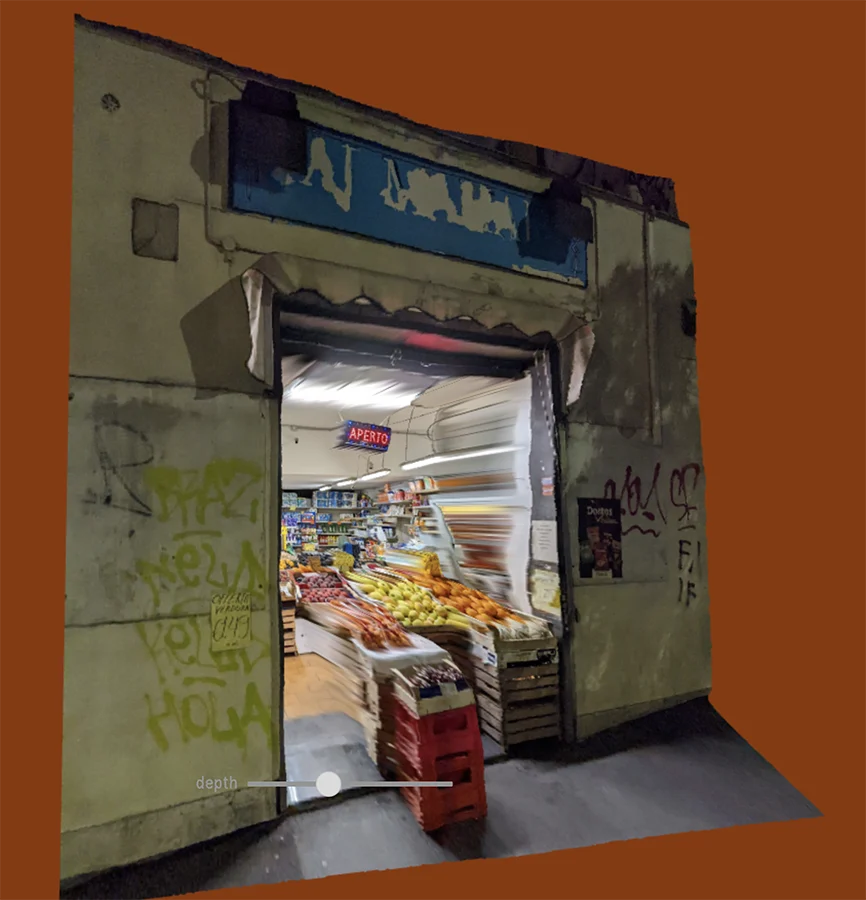
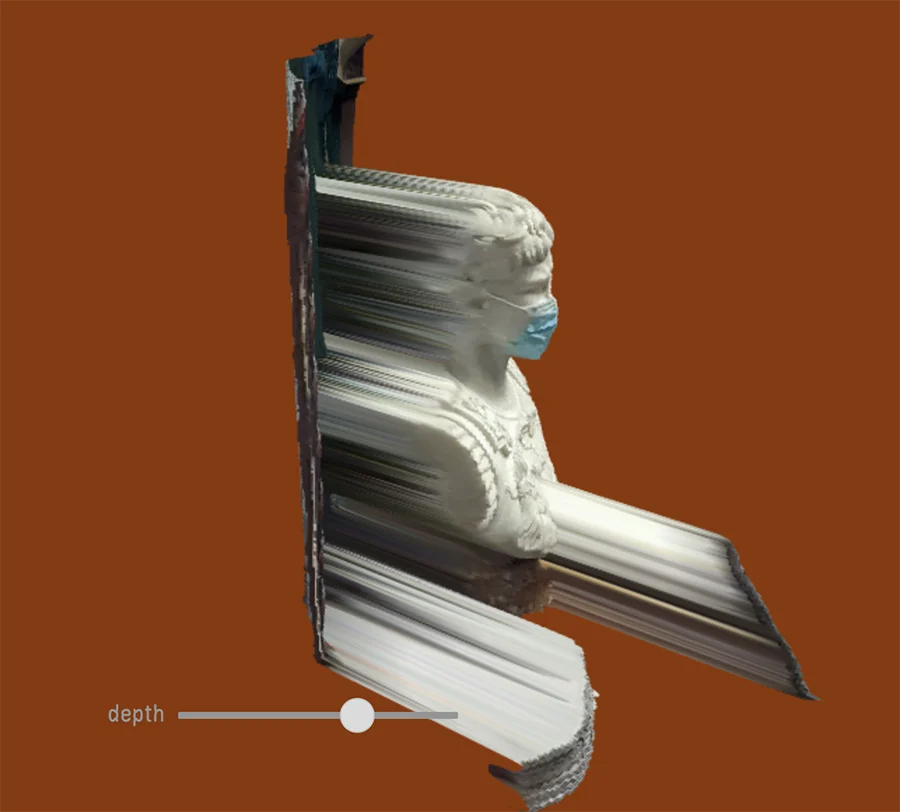
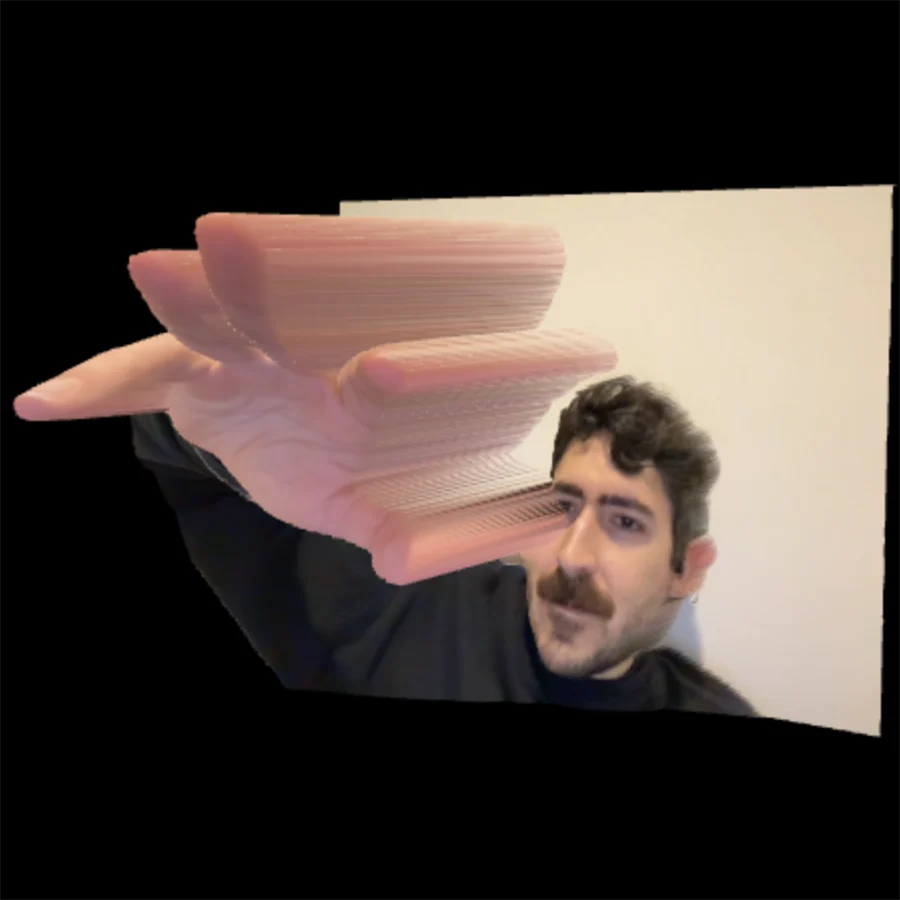
I wanted to be able to play with this more easily, so I built an online tool to apply it to any image uploaded or captured by the webcam:

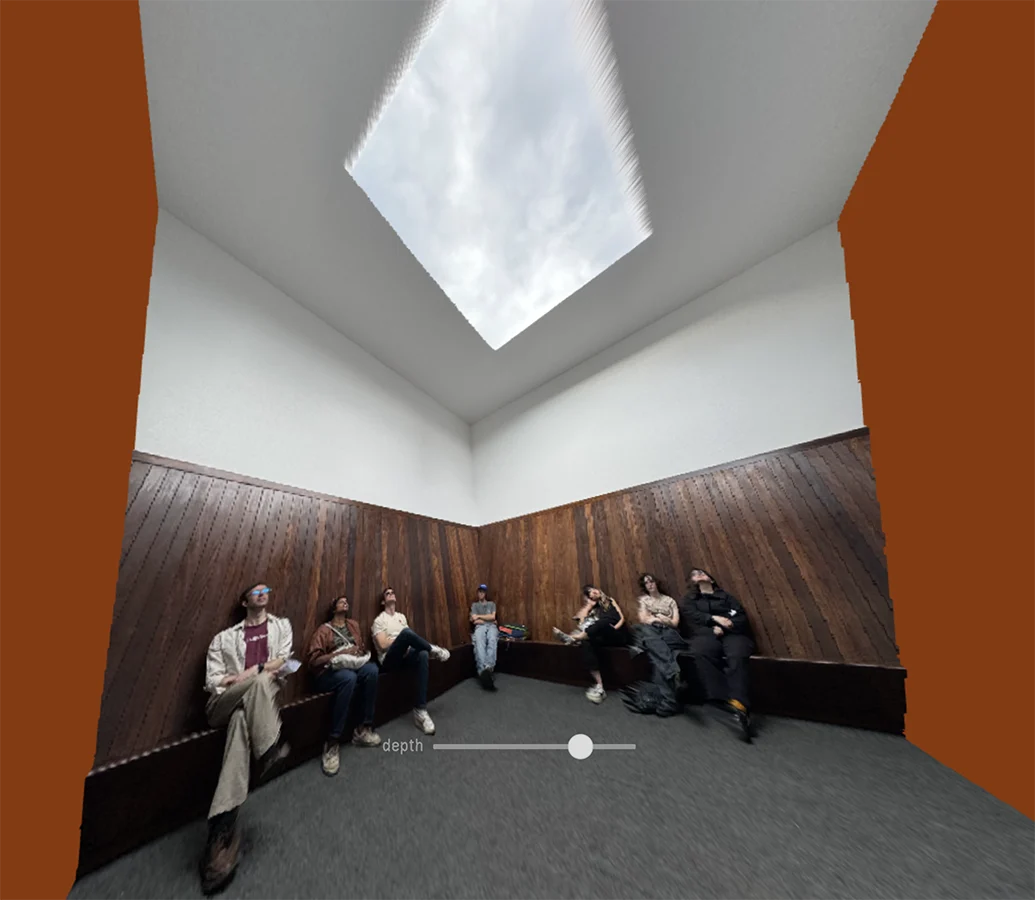
After making the web app and sharing it with some friends, it became clear that I needed to add controls for the depth. Since the models do monocular depth estimation, they can't really tell the absolute z depths. This is apparently a very complex problem due to how different lenses portray depth. With this done, I tested it out on some images:
These explorations opened up some interesting creative possibilities. I want to keep exploring 360 images, as well as images of locations, which seem to look the most realistic.
Furthermore, I want to extend the tool so that I may add multiple 3D images to a same "canvas" and create a composition by moving them around and setting different depths. This way I can prototype how it could work to stitch them together.
Week 05 & 06 ML sketch: Footmark to Keypoint Estimation
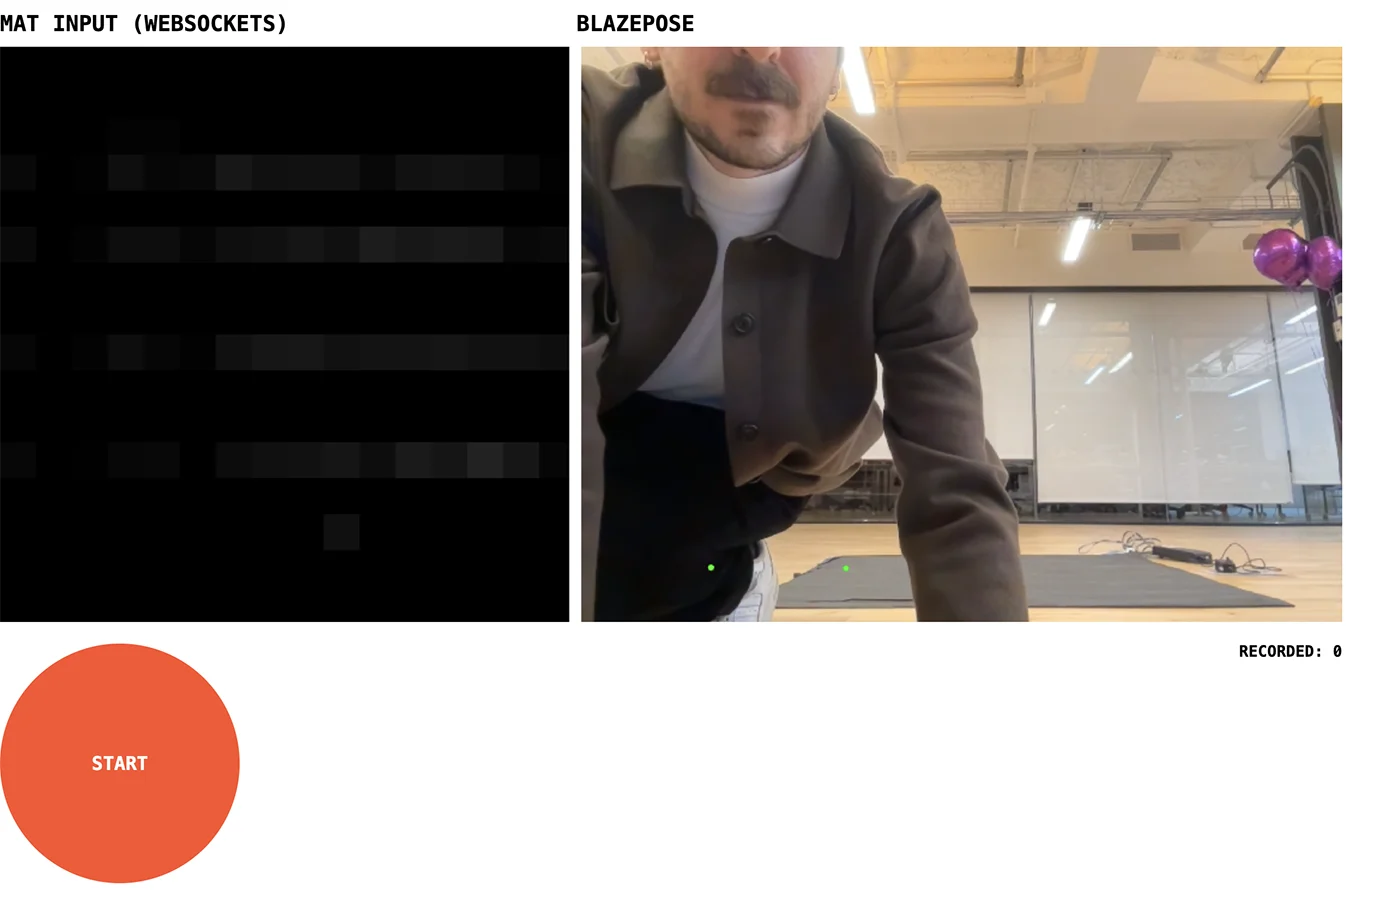
To record the data to train a model based on my proposal, I built a local p5.js sketch that receives the pressure sensitive mat data through websockets, visualizes it and at the same time runs the ml5.js BlazePose model on the webcam. Specifically pointing out the lower body points in x, y and z.
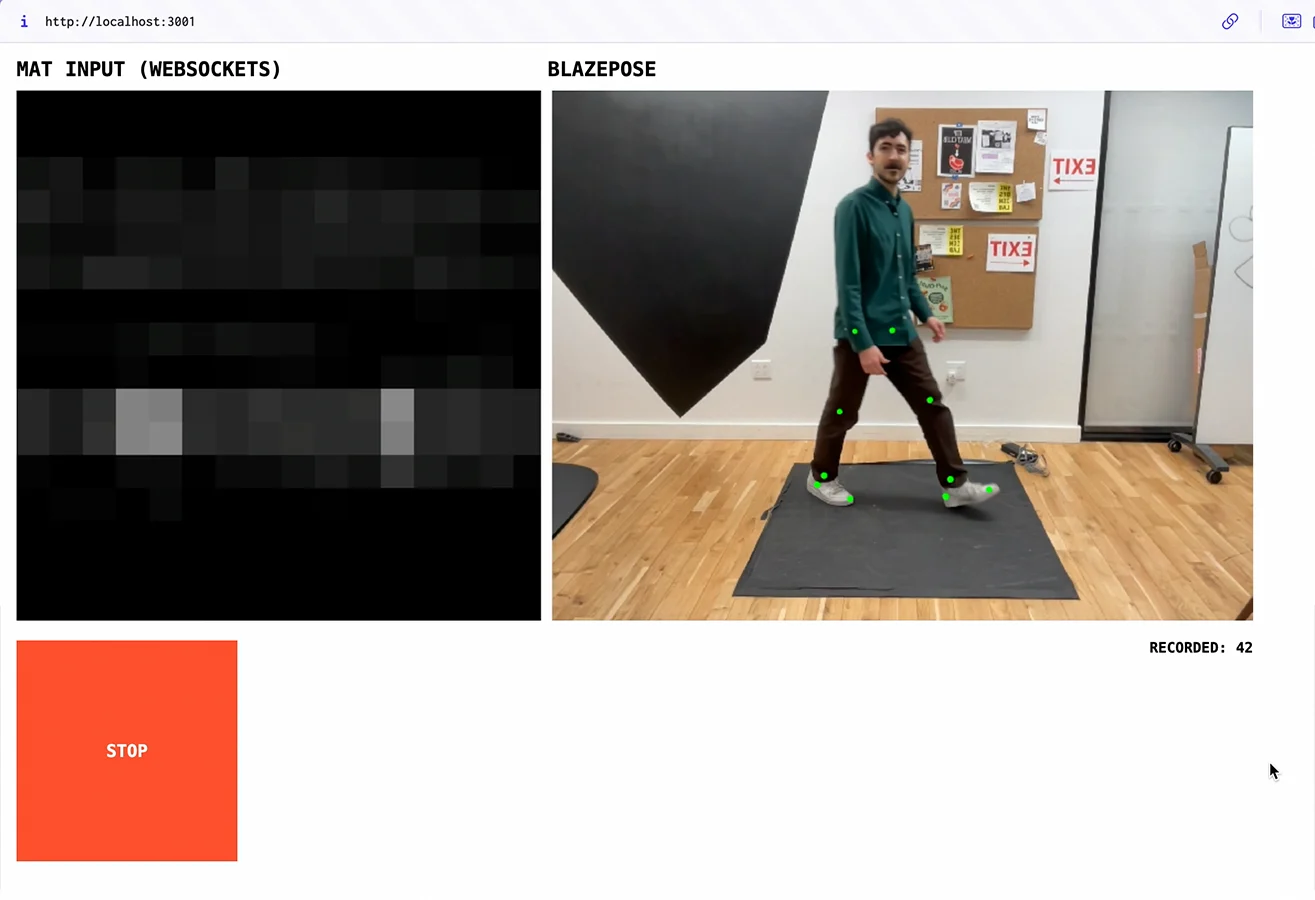
Upon hitting record, the sketch adds the data to the ml5 neural network model object every 200ms, only if the last received mat readings through websockets and the last predicted blazepose keypoints are in time sync.
After recording, I proceeded to save the data to json and make a sketch to train the model. Since this was a regression task with convolutional layers, I was a bit at a loss as to how to structure the architecture of the model, since the only CNN that ml5 has is the imageClassification task. I tested out a few configurations based on LLM recommendations, this one was the one that made most sense to me with regards to how I understand the way CNNs work:
layers: [
    {
        type: 'conv2d',
        filters: 8,
        kernelSize: 3,
        activation: 'relu',
        inputShape: [16, 16, 1]
    },
    {
        type: 'maxPooling2d',
        poolSize: [2, 2]
    },
    {
        type: 'conv2d',
        filters: 16,
        kernelSize: 3,
        activation: 'relu'
    },
    {
        type: 'maxPooling2d',
        poolSize: [2, 2]
    },
    {
        type: 'flatten'
    },
    {
        type: 'dense',
        units: 32,
        activation: 'relu' },
    {
        type: 'dense',
        units: 30
    }
]
Input: a 256 long one dimensional array of values between 0 and 1, representing the level of pressure on the mat at each point.
Outputs: 30 separate single values, each corresponding to one of the x,y,z coordinates of one of the lower body pose keypoints.
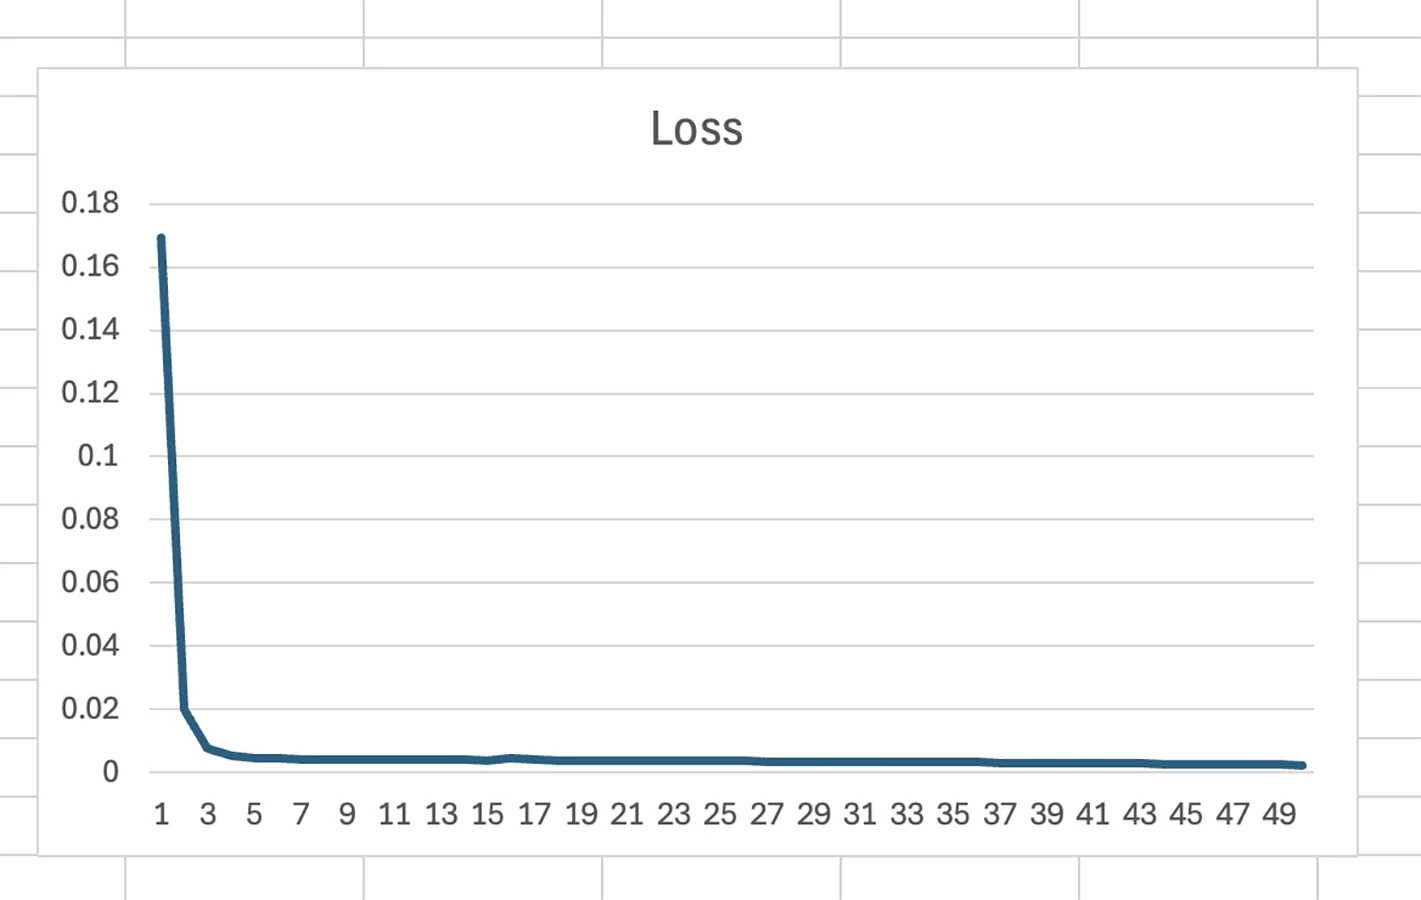
However, all of the ones I tested had the same issue: my loss graph immediately went to 0 after the first epoch:
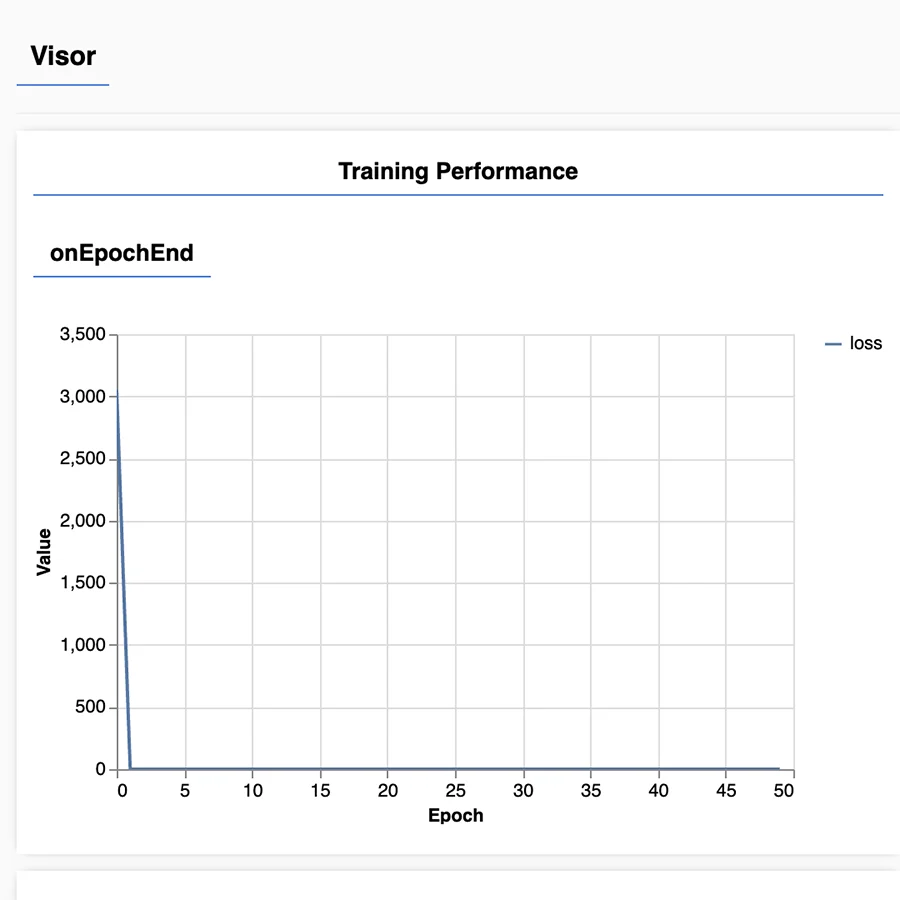
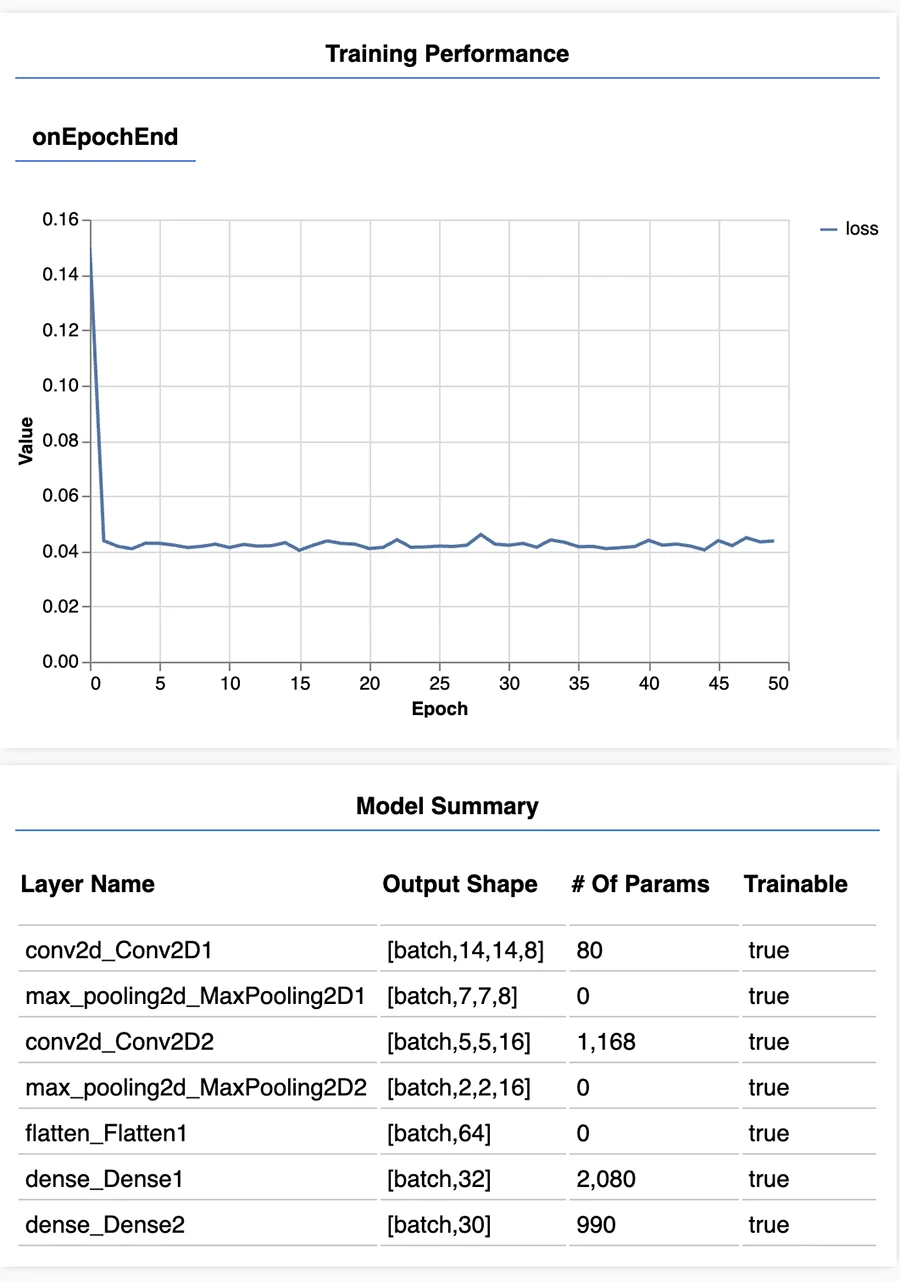
Seemed to me that there could be many issues:
- Too few datapoints was causing it to overfit
- ML5 was not liking me doing a regression with convolutional layers
- Training data was not correclty formatted
- Layer structure was wrong
A few days later, I went back to export my data and run some predictions to see how it worked. When I tried to train again, I got this error originating in ML5's callcallback.js file, after a few epochs:
Uncaught (in promise) TypeError: t is not a functionRight around then, Fabri had told me he faced some similar issues and he managed to go past them by training and running the model directly with Tensorflow.js. He shared his code and I worked from there to transfer my project to Tensorflow.js:
Input: Tensor with the shape [16, 16, 1] corresponding to the pixels from the mat.
Outputs: Tensor with 30 discrete values.
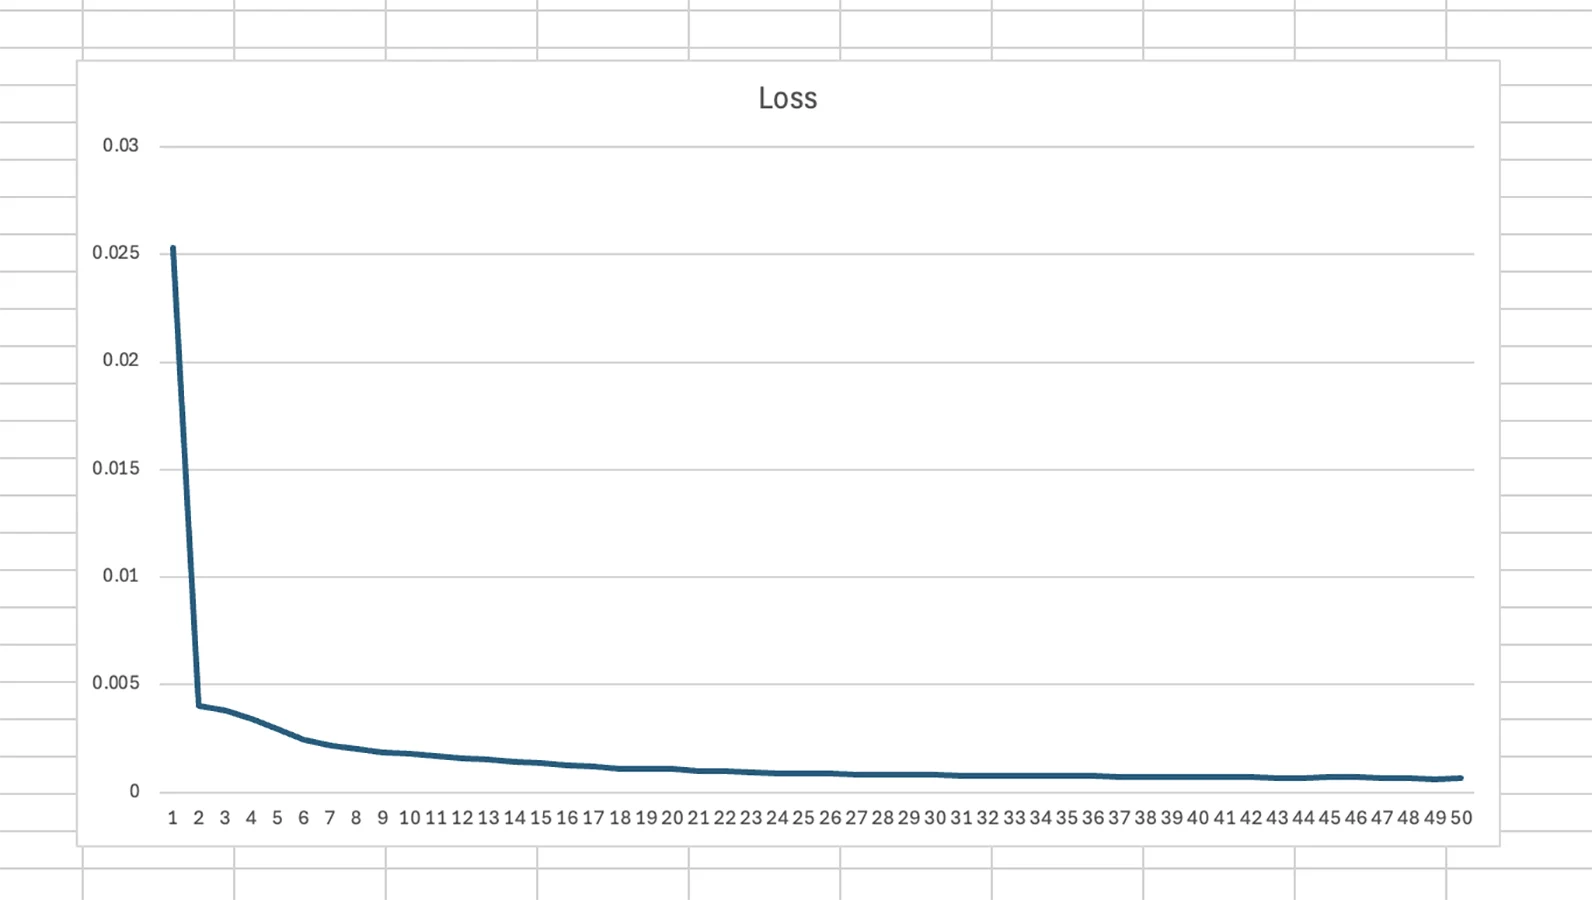
This was my architecture and training parameters:
model = tf.sequential();
model.add(tf.layers.conv2d({
    filters: 8,
    kernelSize: 3,
    activation: 'relu',
    inputShape: [16, 16, 1]
}));
model.add(tf.layers.maxPooling2d({ poolSize: [2, 2] }));

model.add(tf.layers.conv2d({
    filters: 16,
    kernelSize: 3,
    activation: 'relu'
}));
model.add(tf.layers.maxPooling2d({ poolSize: [2, 2] }));

model.add(tf.layers.flatten());
model.add(tf.layers.dense({ units: 32, activation: 'relu' }));
model.add(tf.layers.dense({ units: 30 }));

model.compile({
    optimizer: tf.train.adam(0.0001),
    loss: 'meanSquaredError'
});
Overall I feel like a model of this type could work! The next steps I envision for this are:
- Tweaking the visualization to see the Z coordinate better and be able to evaluate the accuracy.
- Preprocessing the mat image with marching squares blob detection before passing it onto the model to reduce noise.
- Training with more datapoints.
- Training with a higher resolution mat.
Week 04 ML Sketch Proposal: Footmark to Pose Estimation
For this week, I began thinking about a project suitable for training a neural network. Ever since I have been making interactive experiences, I have been writing algorithms to try to detect and react to people.
When I have attempted to "translate" some sensor data to a real-life parameter (for example, the readings of an HC-SR04 to the distance of a user), I have often experienced how my algorithm fails in some unforeseen edge case (ex. as a user approaches my prototype, somebody passes by and confuses the sensor).
The solution has usually been reworking my algorithm, adding more sensors to expand the "sensing field" of my system and/or iterating on the affordances of my prototype to better shape users' interaction intuitions. This usually takes me about 90% of the way there, to the point where breaks in the system are usually noticeable only to me and my teammates.
However, I can't shake the feeling that, if I could rework my algorithm very very meticulously, if I could consider most edge cases and their complex interconnections, I could perhaps bypass the need of adding extra sensors. Or maybe get closer to the 99% of functioning. This is what I think training a neural network could achieve, atleast in some cases.
Last semester, working on Trails Overhead with Audrey Oh, I had this intuition. We had built a velostat mat and were trying to translate the pressure points into the real-life parameter of where the feet are (and whose feet are whose):
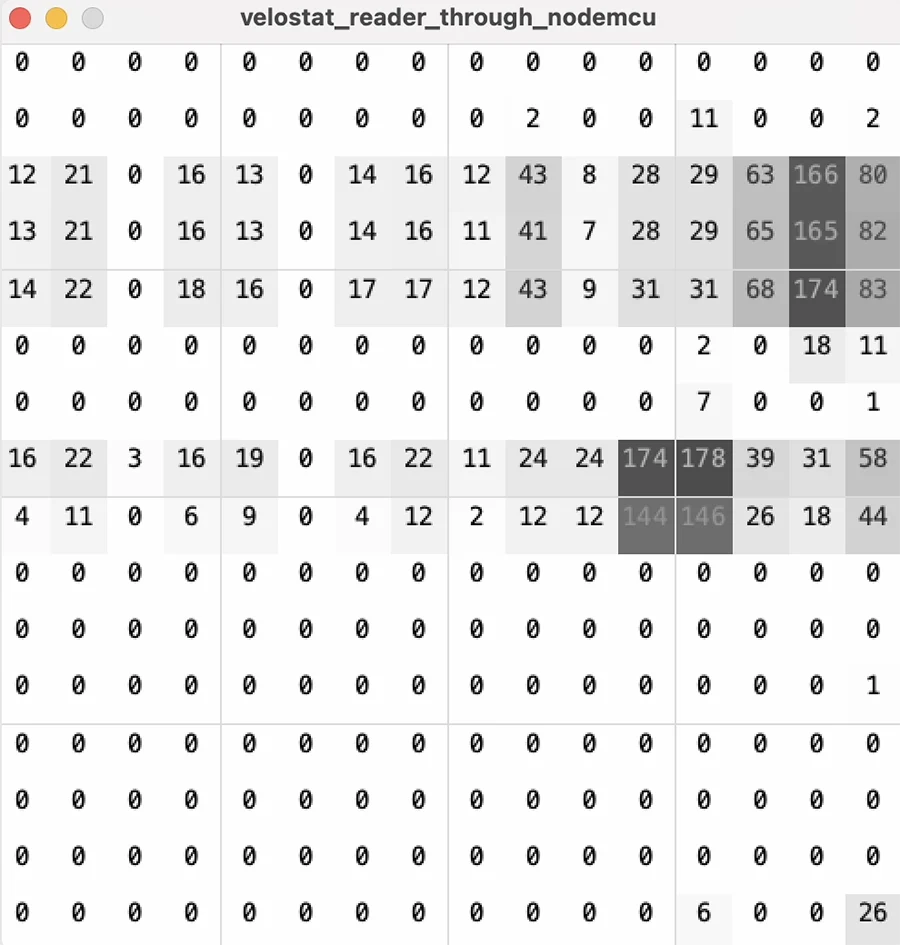
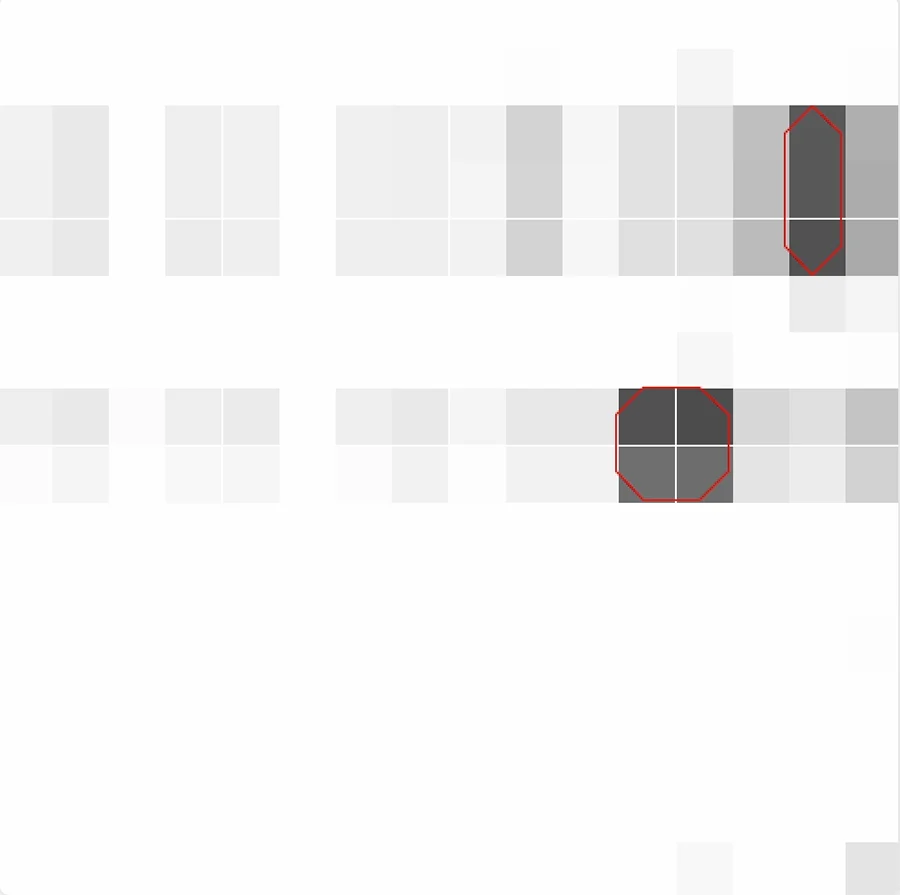
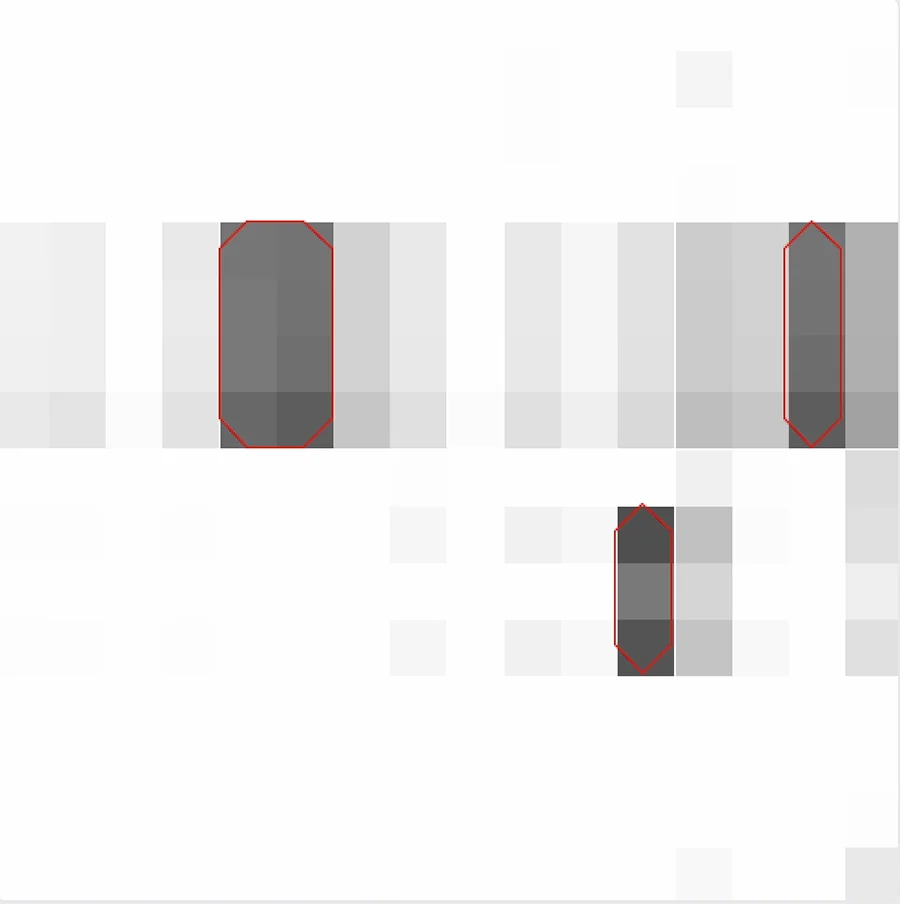
In this scenario, I can't help but think that writing an algorithm is possible, just very very complex. I also have the theory that, because balance ourselves on our feet, any pose we do must have some (maybe minute) changes in weight distribution on our feet, which could be sensed.
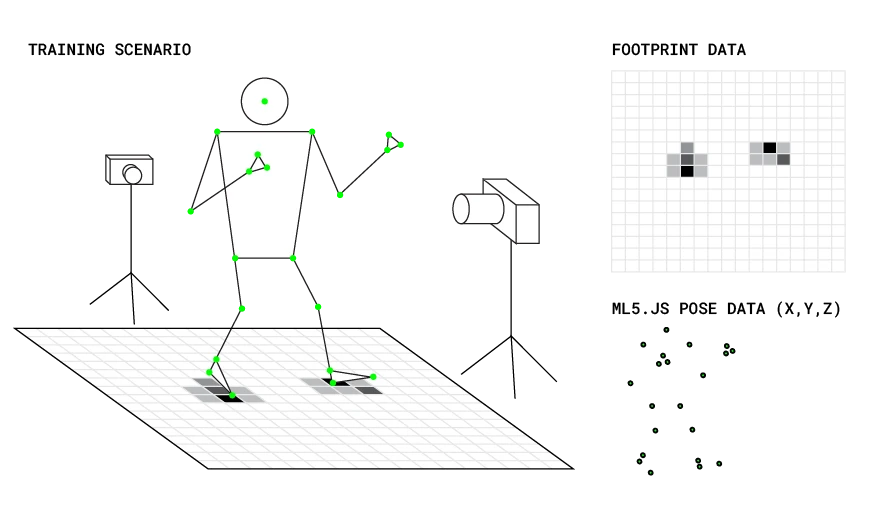
By training a model this way, I want to explore the possibilities that using a sensor like this for high fidelity pose estimation could give.
Inputs: Velostat pressure sensor pixel buffer, maybe as a 16x16 grayscale image. Or maybe just as a one-dimensional array of grayscale pixels.
Outputs: XYZ points of the joints of the person with respect to the mat. Might focus on a small set of points for the initial testing.
Learning task: I'm not sure yet, It seems to me that it would be similar to a classification of sorts.
Challenges: I worry that the resolution of the velostat mat might be too low to give the model enough information. Also, I worry that this task may be too complicated to be trained on the browser. But I am unsure of this. I also worry about the latency when capturing data. What if the velostat readings are available faster/slower than the ml5 ones?
For this first test, I want to limit the training data to just one user at a time.
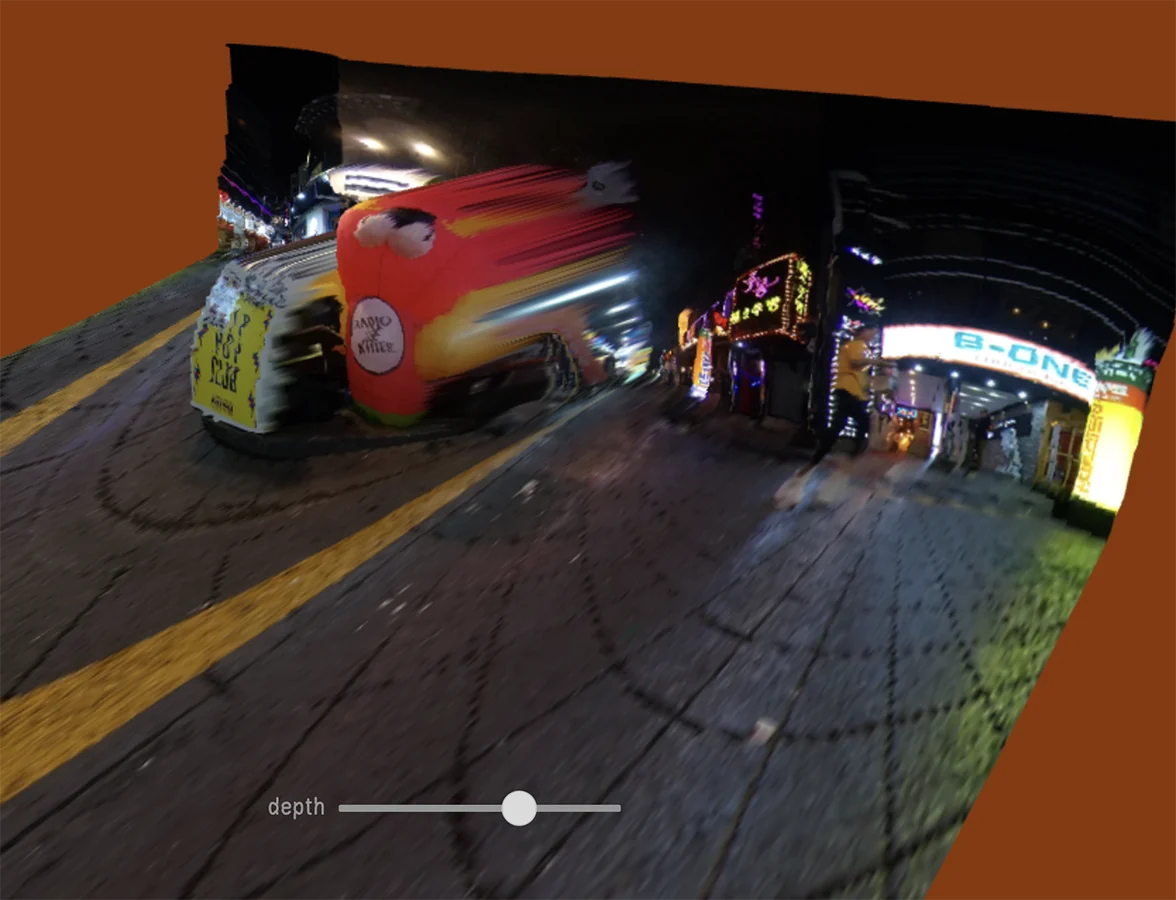
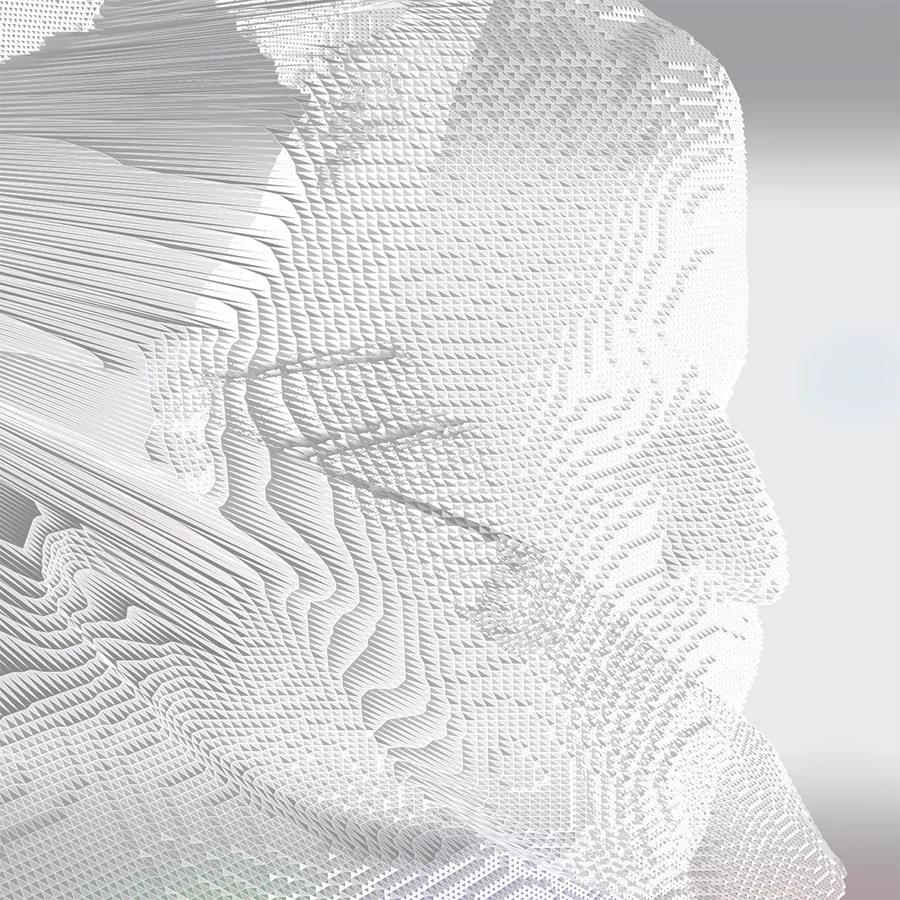
Week 03 Photogrammetry with Depth Estimation
As soon as we saw the depth estimation model example in class, I was immediately intrigued. My experience with depth sensing had always been with the very specialized depth cameras or kinect derivatives. I wanted to see what a point cloud would look like with this model:
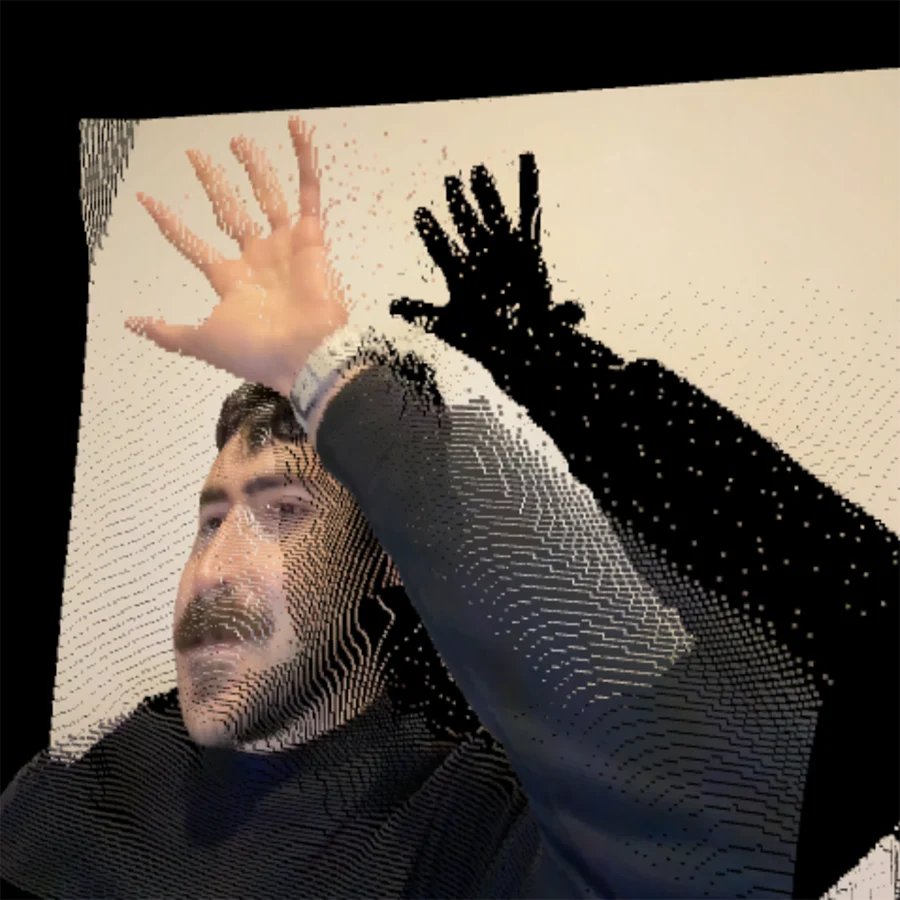
plane for each pixel, and using the estimated depth as the z.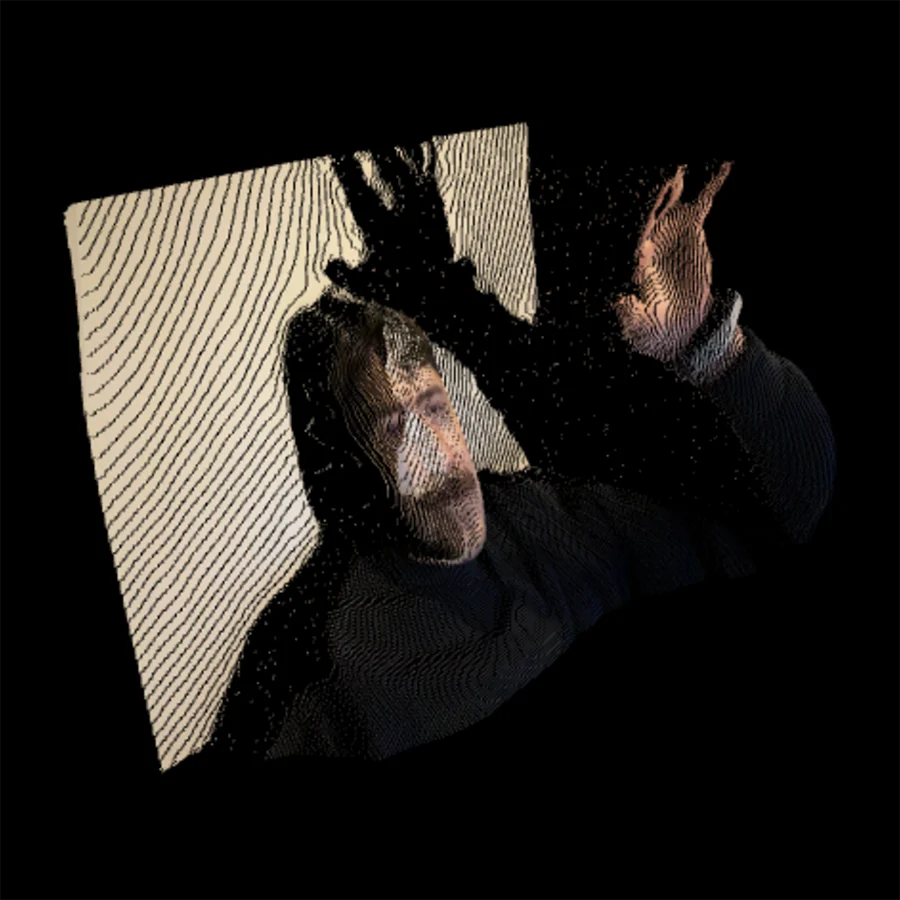
This was very exciting! But since these were just points, when you turned you could see through them. I wanted to try and build a 3D model with this. So I started to look into p5 geometries. Because this was a more intensive process, I couldn't make it run continuously but rather require the user input to take a picture.
I made a loop that would add each 3D "pixel" of the image to a p5 geometry and set its faces manually:
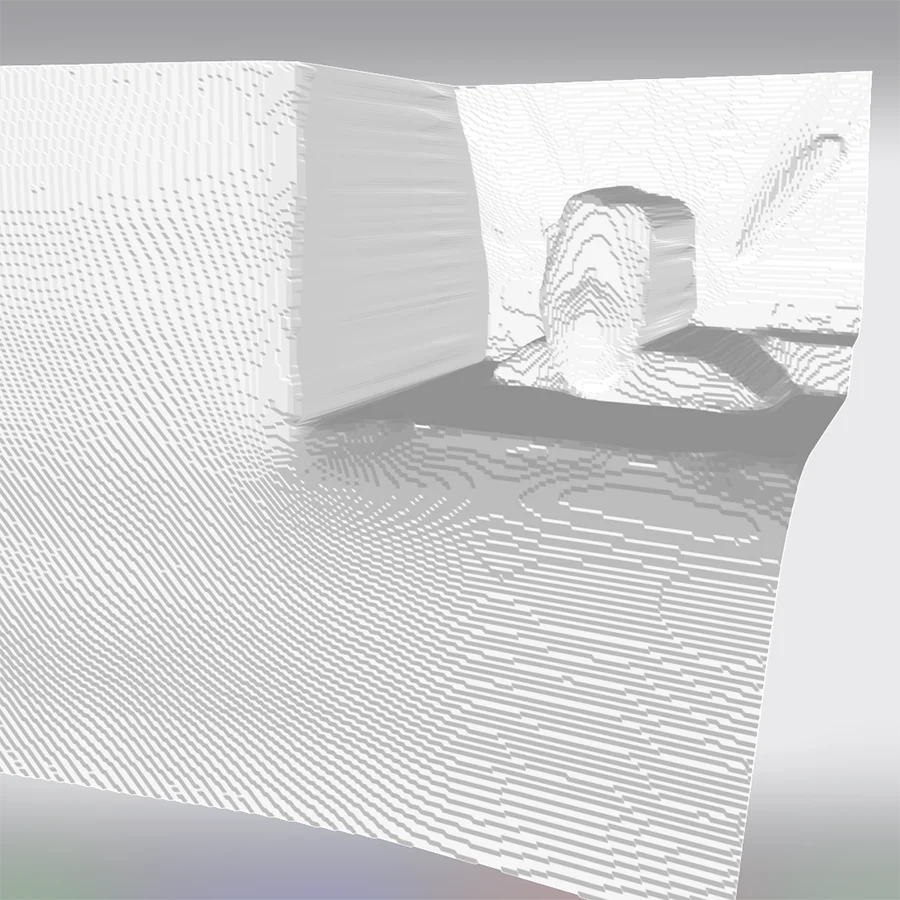
computeFaces() function didn't do a very good job due to the complexity of the shape.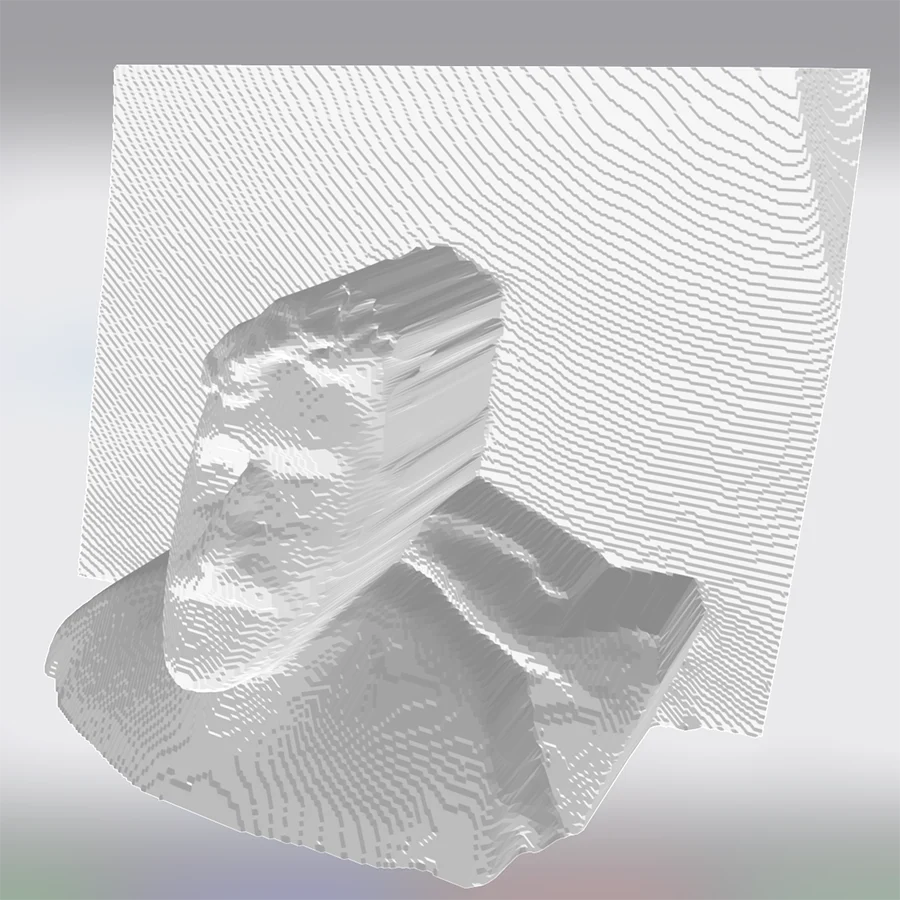
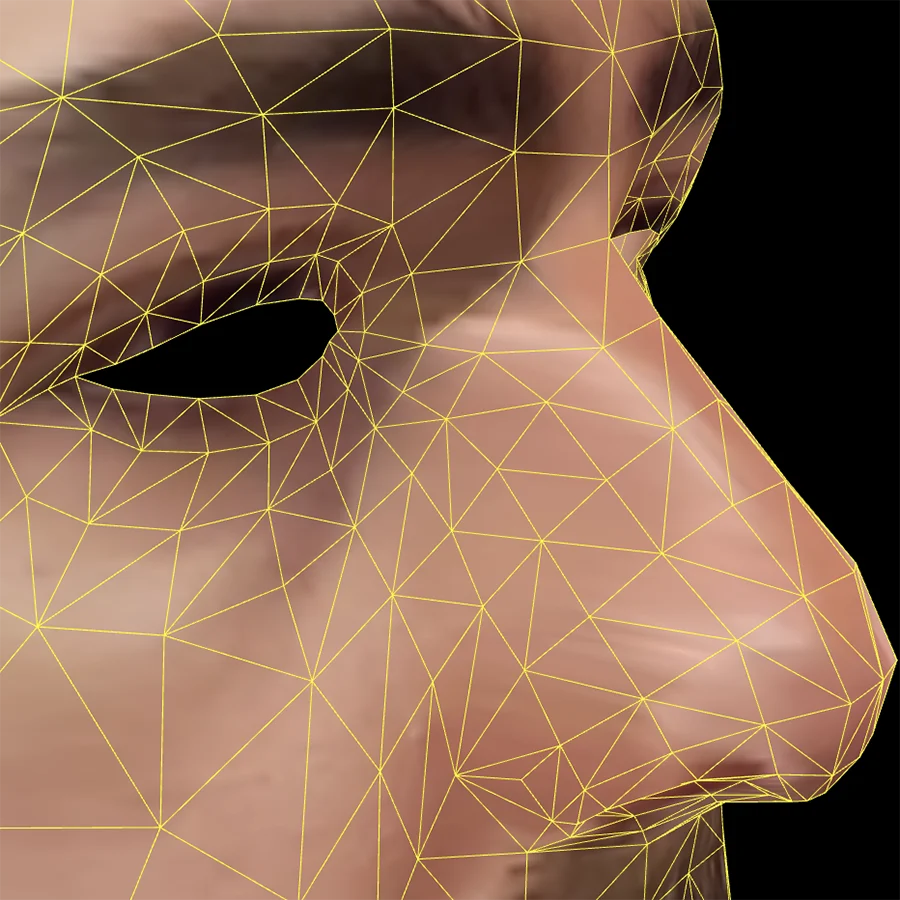
With the shape set, I couldn't help but want to texture it with the photo that was captured through the webcam! Since I learned how this worked from last week's experiments, I set up the UVs to make it possible:
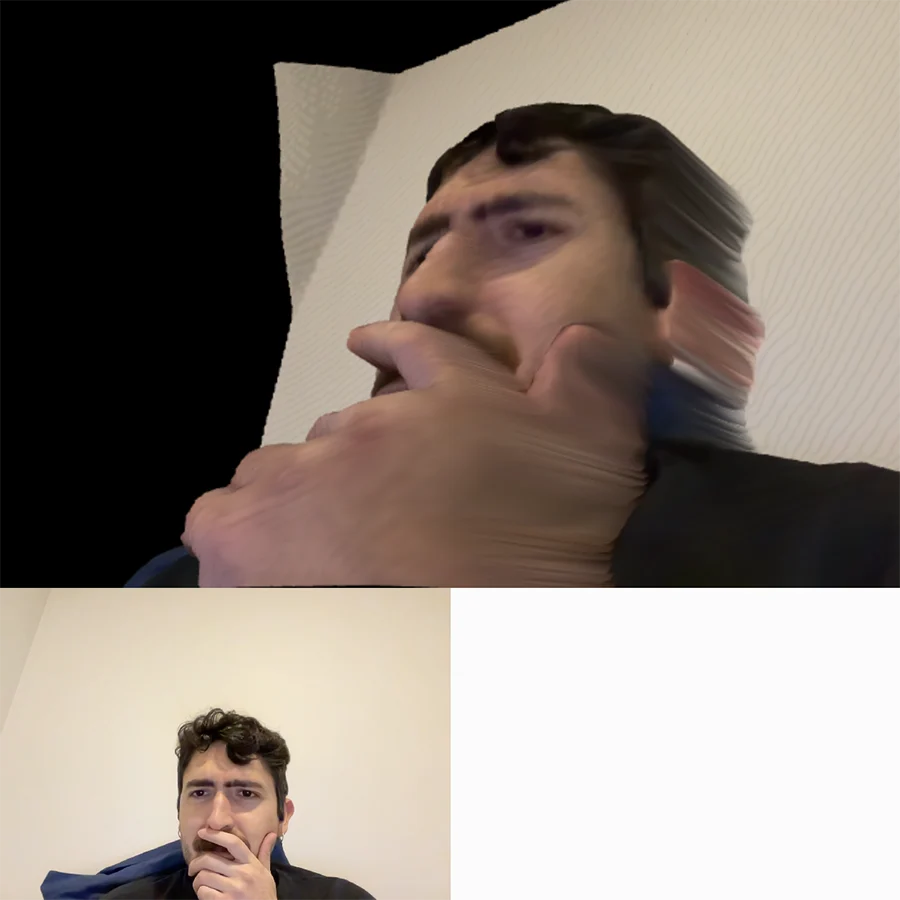
I'm really drawn to the creative possibilities of this method. I wonder if there's any way of optimizing what I'm doing further, so that we can get it running somewhat close to realtime. But maybe p5 is not the best platform for this.
Week 02 Reading on Transfer Learning and Realtime FaceMesh UV Unwrapping
This week I went through the additional material to understand the theory better. The Tensorflow transfer learning article made the concept very clear. Made me wonder how far can we push the new data (in relation to the original training data) and still get an effective transfer learning result. 3blue1brown's videos 1 and 2 also helped me cement some more knowledge, but I still have to get around to the third part.
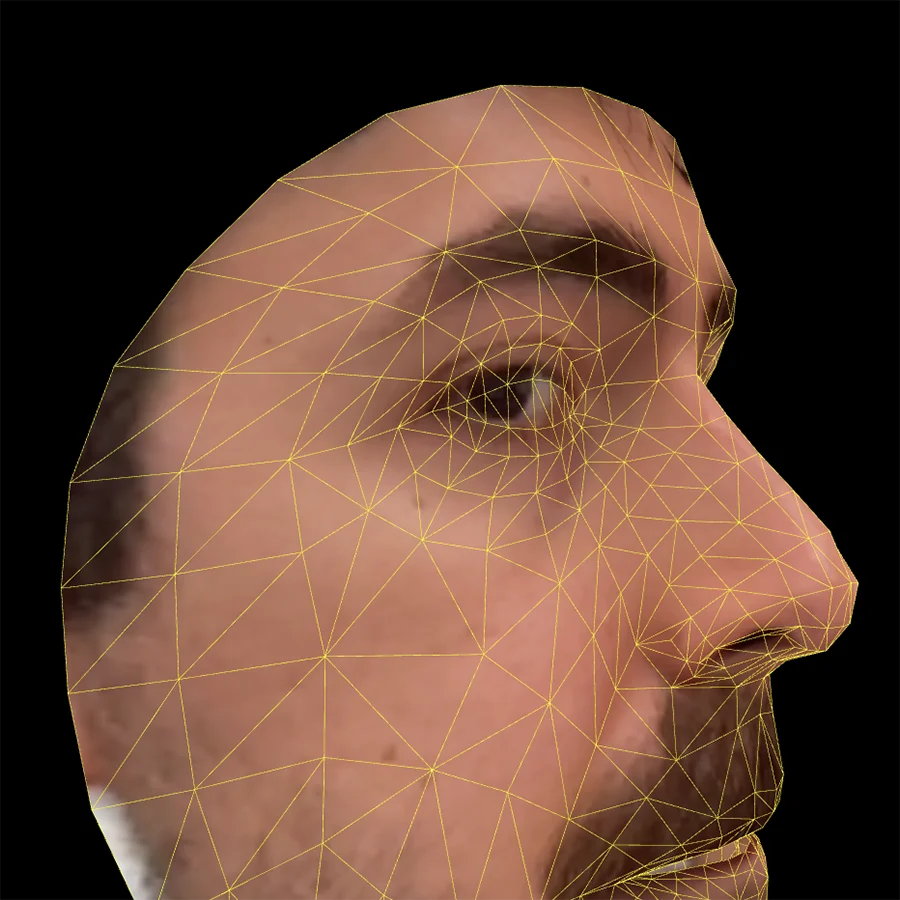
Afterwards I started experimenting with FaceMesh, intrigued by the possibility of mapping the face as a real-time texture. I began by trying to understand the triangle distribution:
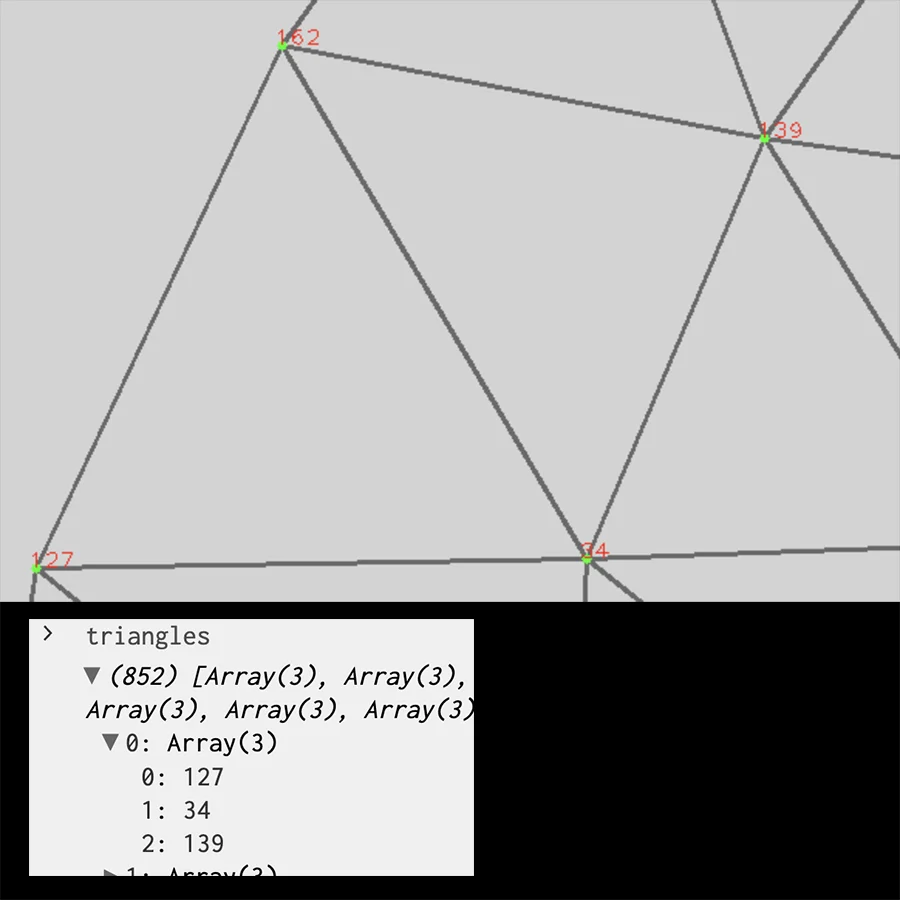
getTriangles() method, I realized they are not the same, as seen on this image. Not sure why that is, but it turned out to not to cause any problems.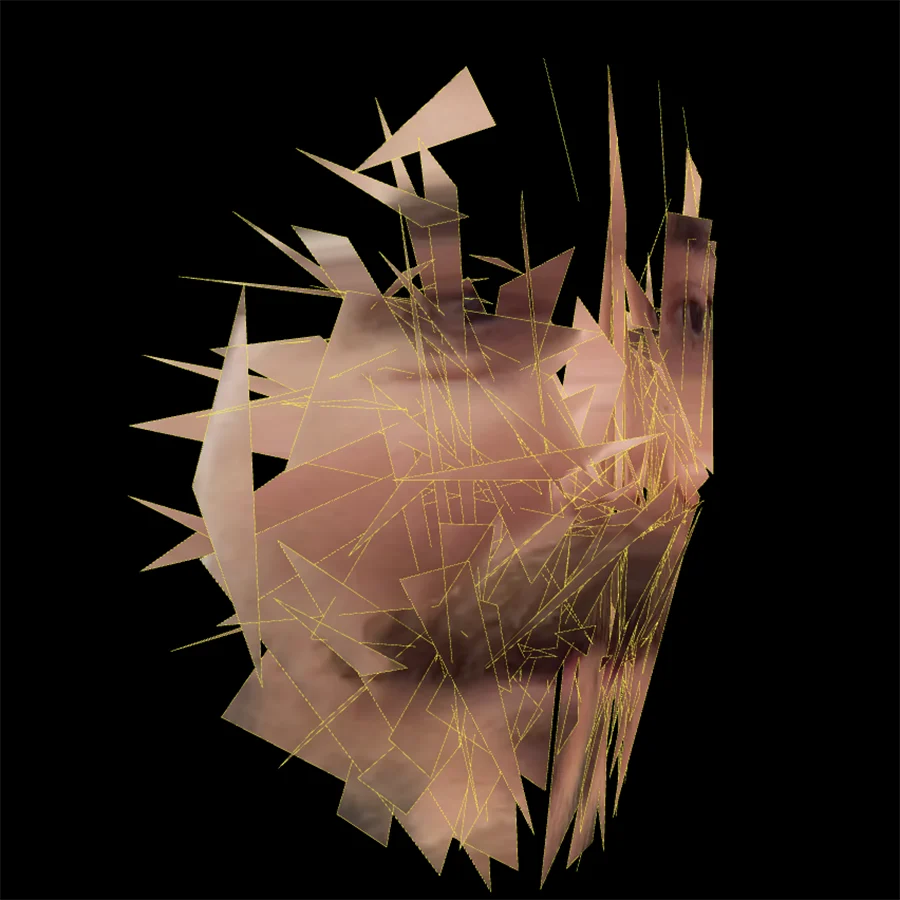
Once this was clear, I wanted to add the eyes onto the mesh:
After this, I wanted to figure out how to flatten the face. How to get a realtime unwrapped UV map of the face.
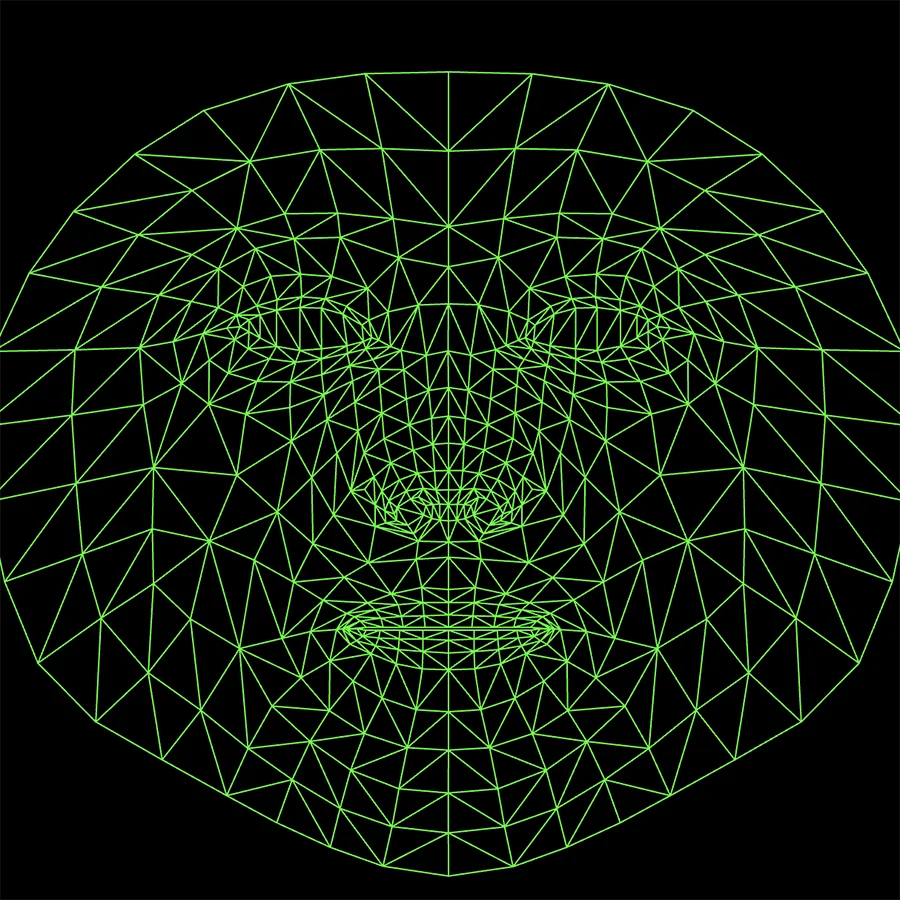
getUVCoords() method to get the static 2D locations of each vertex of the face model. These I then mapped to the dimensions of the canvas.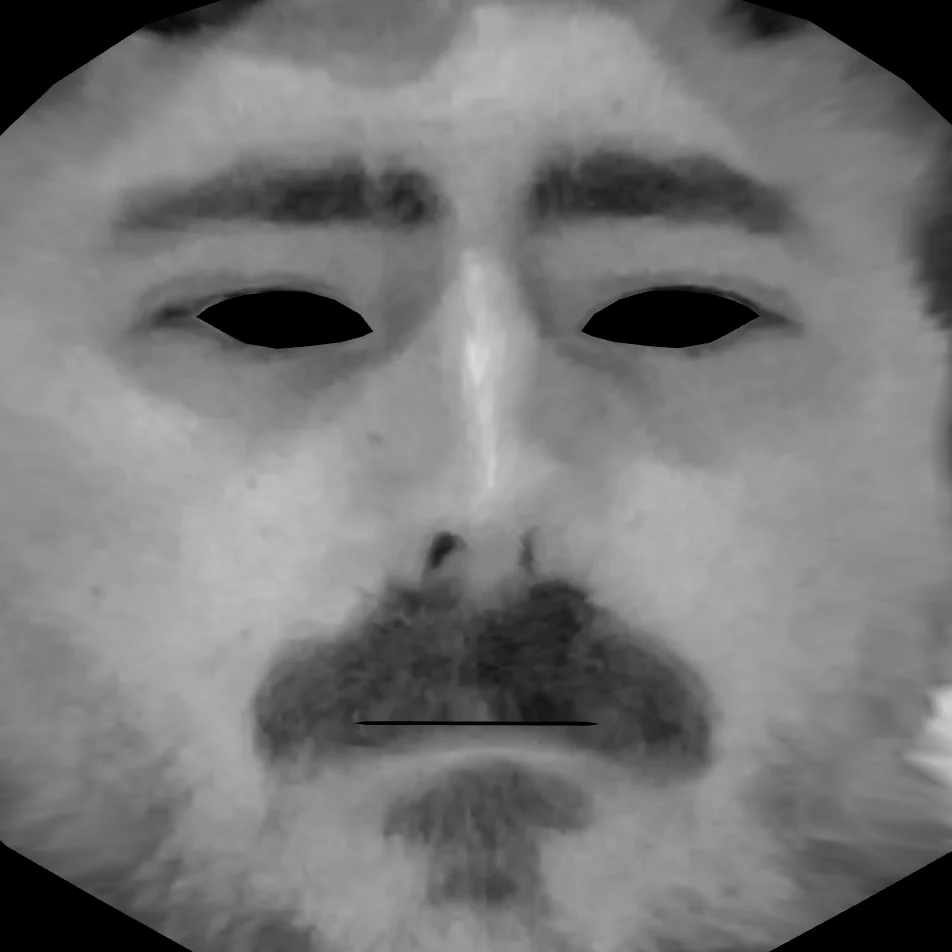
It would be great if the base static model could be accessed not only in 2D but in full 3D directly with a facemesh method. Right now seems like this is not included, here is some discussion on a workaround that I found very informative.
That being said, In my understanding, this model homogenizes all facial structures to follow the base 3D face model. It is, for example, uncapable of capturing the actual shape of my nose, even when I look sideways.
It sort of makes sense considering the model is meant to add fun 3D effects to/around the face, and not actually make accurate photogrammetry. This I think is something creators need to understand before making experiences using the model, as the depiction of the user's 3D face on screen is a distortion of their real appearance.
Week 01 "Excavating AI", "Humans of AI" and Image Classification
"Excavating AI" uncovered a lot of the black box behind the categorization of data for AI for me. It is very confounding to see how little thought was given to some of the categories of the ImageNet dataset before proceeding with the labelling. I can't imagine what good or non-harmful use could be derived of categorizing people through such detailed and loaded classes.
The lack of context in the images is also a big issue. Vision is a time-based sense, we are continually seeing and reinterpreting our vision based on different levels of context, including the events happening immediately before. Instead, these datasets look only at one moment, extracted from time and space, ignorant to any sort of contextual clues. With this in mind, it is hard to imagine how AI systems trained on this dataset (and the clickworkers) could not get the wrong idea most of the time, when it comes to classifying people.
Some more personal levels of this context are explored in "Humans of A.I.", in which very meticulous work of archeology is done to find the original creators of the images used to train the COCO dataset, and give not only recognition to their images but also look into what these images and their subjects meant for them. Through this work it is easy to see oneself reflected in the work behind ai models, in a way they seem to be things we build together. However the way the data is treated, through obscuring and decontextualizing, breaks this apart.
I wonder about the plausibility of making fulling transparent ai models. Calls for participating in a dataset, willingly and with credits. How could these credits be a part of the model itself and not of the readme? Could one of the object literal key-value pairs, returned by the model when making a prediction, contain the name of a dataset contributor? Is there a good way to choose a contributor dynamically in a way that is also related to the prediction?
For the exercise this week, working with image classification, I had a hard time choosing what to create. Every time I have worked with training image classification in Teachable Machine I always face the same issue that the trained model only works well in the same controlled conditions. As soon as the lighting or location changes, things start to break down.
To try to combat that, I tried training a classification model with poses instead of images per se, as I think that would make it more resistant to changing conditions.
It was really hard to get it to detect face orientation reliably. Clearly this is something better suited to an if statement but just for the sake of testing I pushed on.

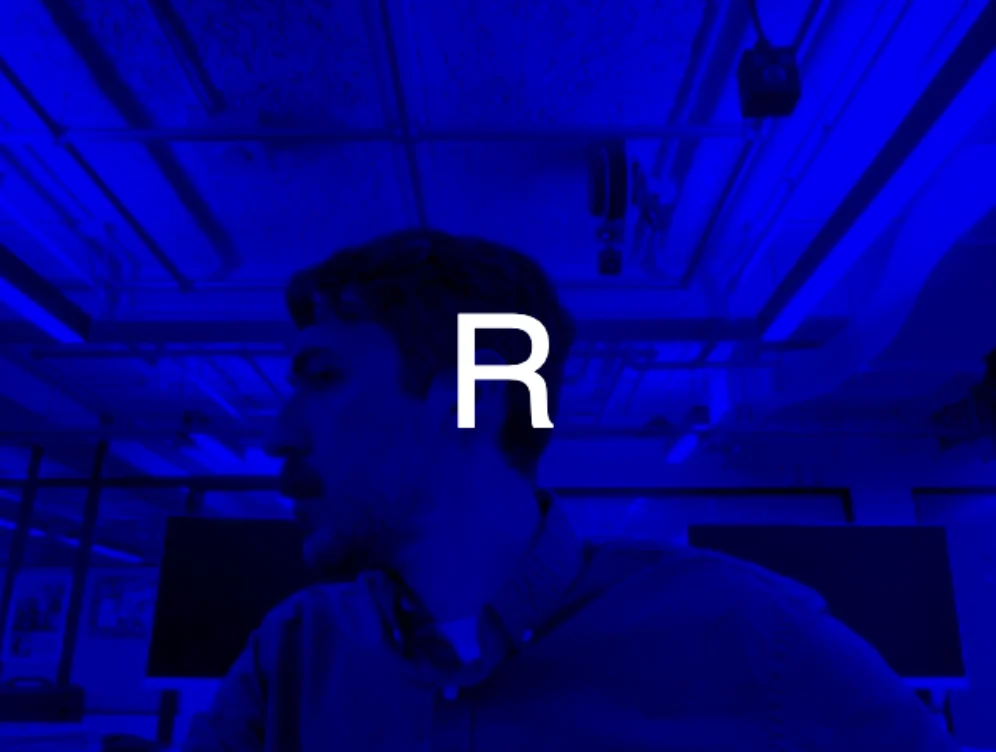
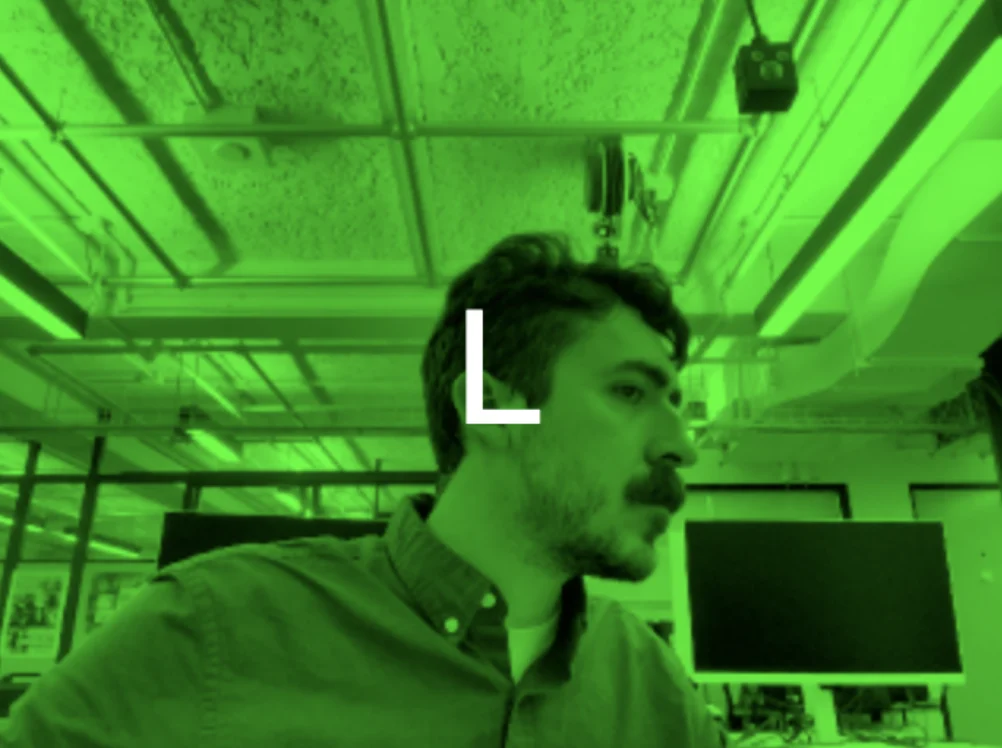
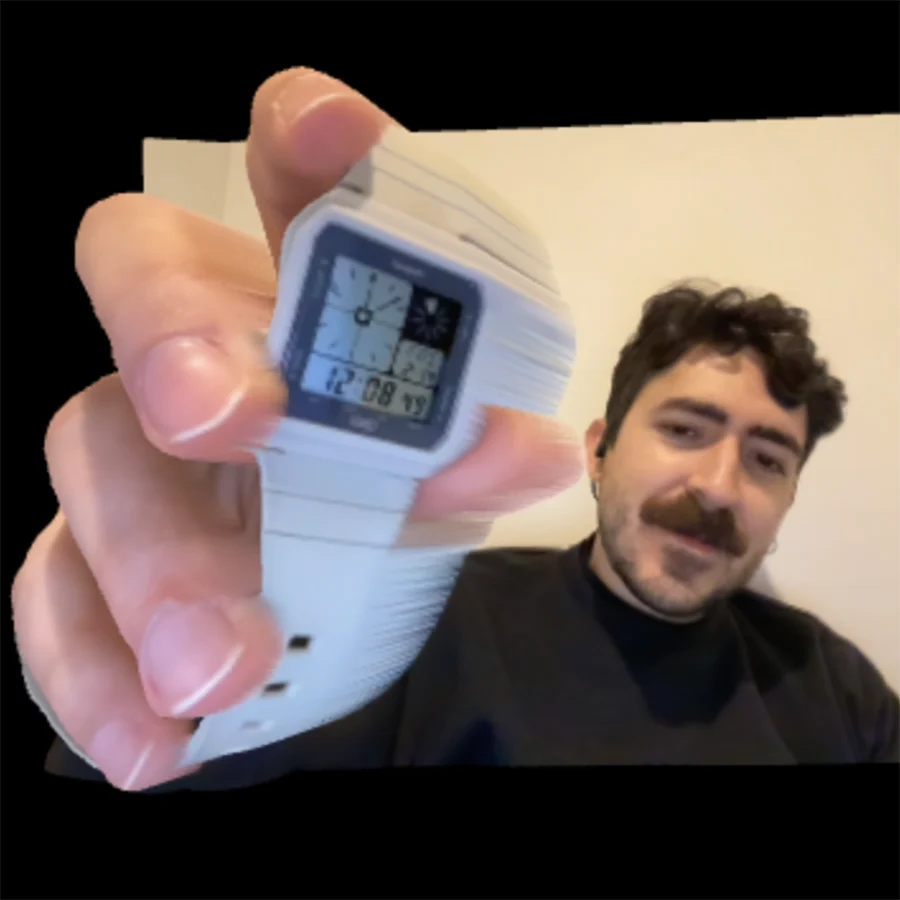
I soon figured out that the given example for p5js didnt work for this type of classification, so I had to look up how to use this type of teachable machine model with p5. I found an example by Dan O Sullivan that worked great, so I started out there.
This is the test sketch I made (pictured above), because it is using poses, I hope it will work with other people and not only me, but I have yet to test that out.